> ## Documentation Index
> Fetch the complete documentation index at: https://bytebeam.io/docs/llms.txt
> Use this file to discover all available pages before exploring further.
# Pushing data to Bytebeam
Publish data to `/tenants/{tenant_id}/devices/{device_id}/events/{stream_name}/jsonarray` in JSON array format.
# Introduction
The previous section shown us how to connect to bytebeam. It is now time to start pushing some data.
All communication with Bytebeam happens using JSON. On Bytebeam data is organised into [Streams](https://bytebeamio.mintlify.app/platform-guide/streams-tables/introduction-to-streams). Each stream is mapped to an MQTT topic. Go through the [Creating a Stream](https://bytebeamio.mintlify.app/platform-guide/streams-tables/creating-a-stream) guide to create a stream.
Every project in bytebeam comes with a default stream called [Device Shadow](https://bytebeamio.mintlify.app/getting-started/device-shadow). We will be illustring how to push data using this stream.
# MQTT topic and payload structure
### Topic structure
To push data to any stream, you need to publish data to the MQTT topic:
`/tenants/{tenant_id}/devices/{device_id}/events/{stream_name}/jsonarray`
Replace `{tenant_id}` with your project name and `{device_id}` with the device id. You can find these in the JSON file downloaded in the previous section.
Say we are on `demo` project and device id is `1`, so in our case, topic for device shadow will be:
`/tenants/demo/devices/1/events/device_shadow/jsonarray`
Data should be published with QoS 0 or 1 only, QoS 2 is not supported yet.
### Payload
The payload must be a jsonarray, which is an array of data point, where data point is just a JSON object with following fields:
* `sequence`: an auto incrementing number for each packet
* `timestamp`: Timestamp in milliseconds
* other fields of the stream ( note: Field names are case sensitive )
so example of a payload for our device\_shadow which contains field `Status` will look like:
```json theme={null}
[
{
"sequence": 1,
"timestamp": 1710760059006,
"Status": "On"
}
]
```
*A device should only publish data to the tenant it is connected*.
**\_Device will be disconnected** if device connected to tenant `demo`, tries to publish to other tenant, say `mytenant`,
e.g. `/tenants/mytenant/devices/1/events/device_shadow/jsonarray`
### Batching Data
As the payload that server accepts is a JSON array. If your client is expected to generate a large amount of data it will be more efficient to batch data and send it to the cloud instead of sending a single packet with each message.
For example:
```json theme={null}
[
{
"sequence": 1,
"timestamp": 1710760059006,
...
},
{
"sequence":2,
"timestamp": 1710775681047,
...
}
]
```
### Compressing Data
If you are sending larger batches of data you can save on data size by sending `zlib` or `lz4` compressed data.
zlib compressed data for stream should be published to:
```
/tenants/{tenant_id}/devices/{device_id}/events/{stream_name}/jsonarray/zlibdeflate
```
( Notice the `zlibdeflate` at end of topic )
LZ4 compressed data for stream should be published to:
```
/tenants/{tenant_id}/devices/{device_id}/events/{stream_name}/jsonarray/lz4
```
( Notice the `lz4` at end of topic )
Data must be compressed in **LZ4 Frame** format! You can verify it by magic bytes, i.e. the initial bytes of compressed data, they shoud be `04 22 4d 18`
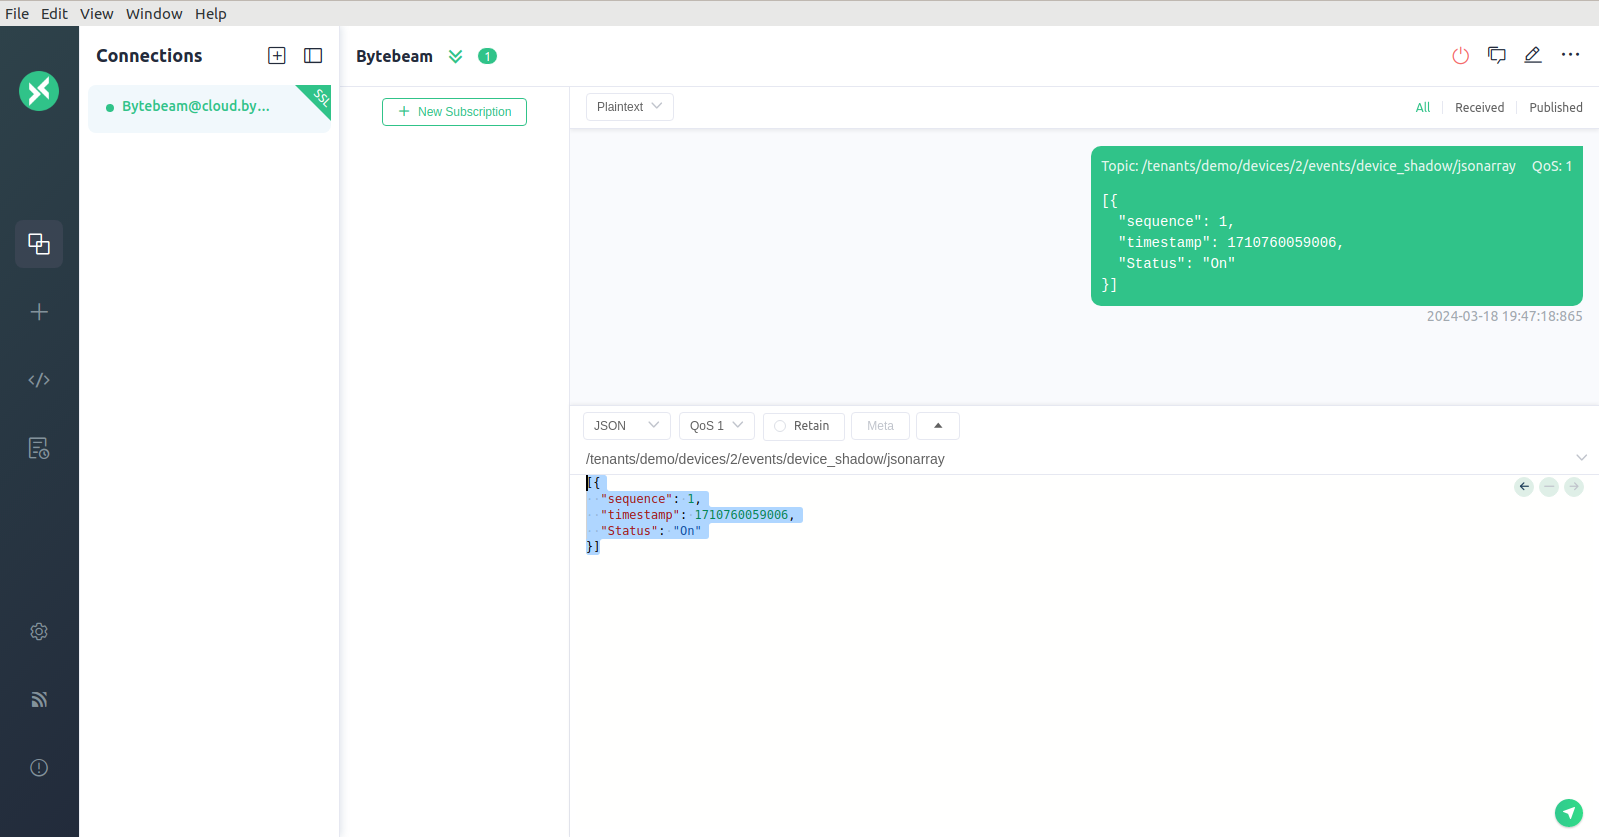
# Trying it out with MQTTX
You can try publishing data using MQTTX as shown below. Notice the QoS1 setting:
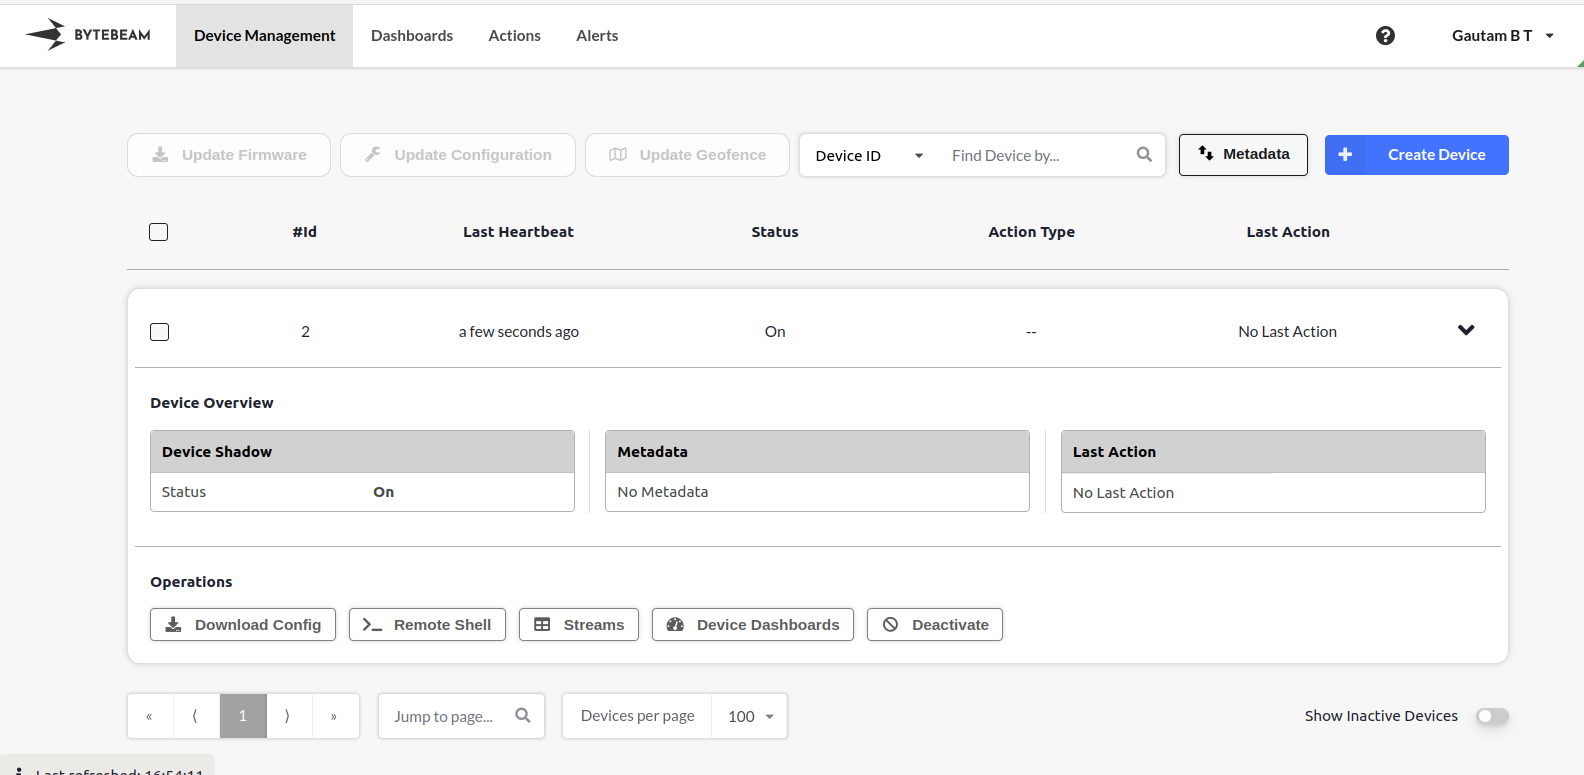
You should see the Status change on Bytebeam now: