> ## Documentation Index
> Fetch the complete documentation index at: https://bytebeam.io/docs/llms.txt
> Use this file to discover all available pages before exploring further.
# Action Details & Device Management
The detail view enables you to manage ongoing actions and monitor each device's progress in an action.
To access the detailed page of an action:
Go to the **Actions** tab at the top of the console.
Select an action, then click on the **View Details** button to see the detailed view of the action.
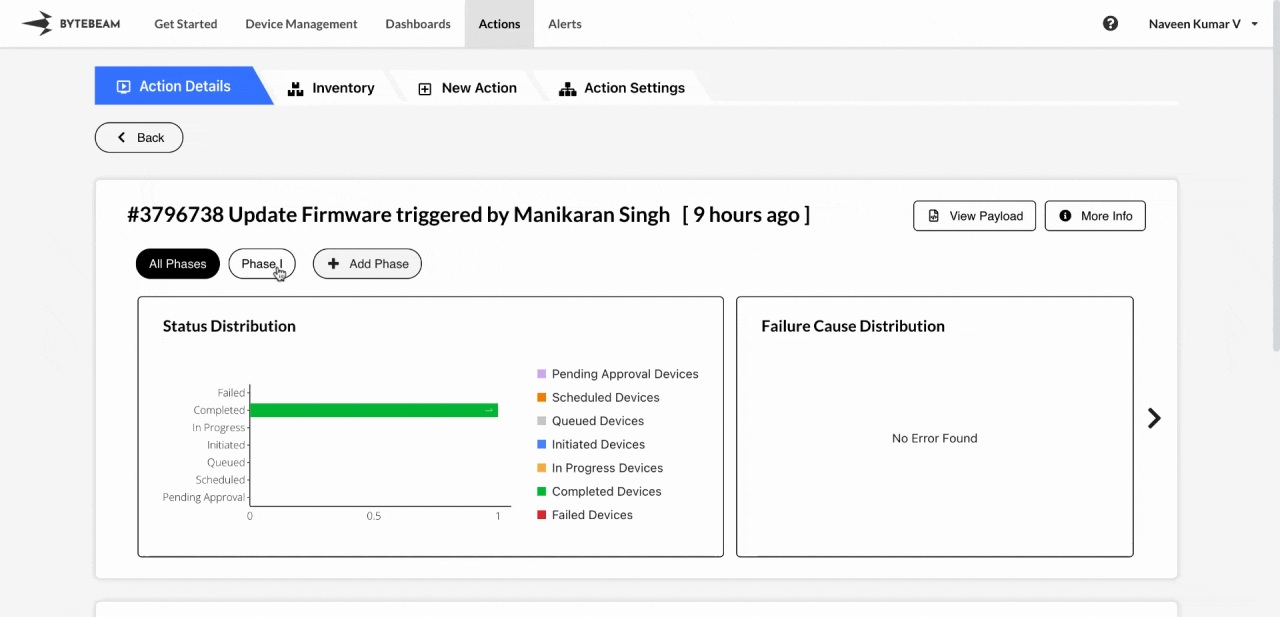
## Viewing Payload and Additional Information
**View Payload:**
Click on View Payload to see the payload data for the selected action.
This option will be disabled if the action has no payload.
**More Info:**
Click on More Info for action details such as type, ID, trigger time, schedule, auto-retry setting, and timeout duration.
## Data Visualizations
The detail page includes the following graphs for visualizing action progress:
**Status Distribution Graph**: Displays the number of devices in each state for the action.
**Failure Distribution Graph**: Shows the reasons for any device failures during the action.
**Latency Histogram**: Displays the time, devices spend in each state across phases.
To view the Latency Histogram, click on the forward (>) icon.
## Adding Phases
You can add additional phases to an action to include more devices, set a custom trigger time, and execute the action on the newly added devices.
To add a phase:
Select the action and click on **View Details**.
Click on **Add Phase** at the top.
Choose the devices and set a **Custom Time** using the **Calendar dropdown**, then click **Submit**.
Devices already included in previous phases cannot be selected for a new phase.
## Filtering Devices by Action State
The Filters feature allows you to view devices in a specific action state, such as Scheduled, Completed, or Failed.
To filter devices by state:
Navigate to the **Actions** tab at the top.
Select an action, open the **View Details** button, and scroll down to the **Filters** section.
Click **Filters** in the device list, select states by checking boxes like Scheduled, Completed, or Failed.
Once applied, the selected filters will appear at the top of the device list.
## Managing Actions for Devices
Within the device list, you can manage actions on individual devices:
Marks all previous actions as complete on the selected device. Click the **Mark All Actions as Complete** icon next to the device to confirm.
View logs detailing action progress by clicking the **Action Progress Logs** icon beside the device.
Access a comprehensive device overview, including historical actions, by clicking the More Details icon.
Cancel an action if it is no longer needed by selecting the device, clicking **Cancel Action**, and confirming.
This option is disabled if the action is already completed or failed for the device.
Retry a failed action by selecting the device, clicking **Retry Action**, and confirming.
This option is disabled if the action is not in a 'Failed' state.
Manually mark an action as complete by selecting the device, clicking **Complete Action**, and confirming.
This option is disabled if the action is already in a 'Completed' or 'Failed' state.
Cancel an entire phase if it is no longer needed by selecting the phase at the top, clicking **Cancel Phase**, and confirming.
This option is disabled if all devices in the phase are already in completed or failed states.
Retry a failed phase by selecting the phase at the top, clicking **Retry Phase**, and confirming.
This option is disabled if any of the device is in a state other than 'Failed'.