> ## Documentation Index
> Fetch the complete documentation index at: https://bytebeam.io/docs/llms.txt
> Use this file to discover all available pages before exploring further.
# Creating a new Geofence Configuration Version
To create a new Geofence Configuration version in Bytebeam console,
Click on the **Actions** tab.
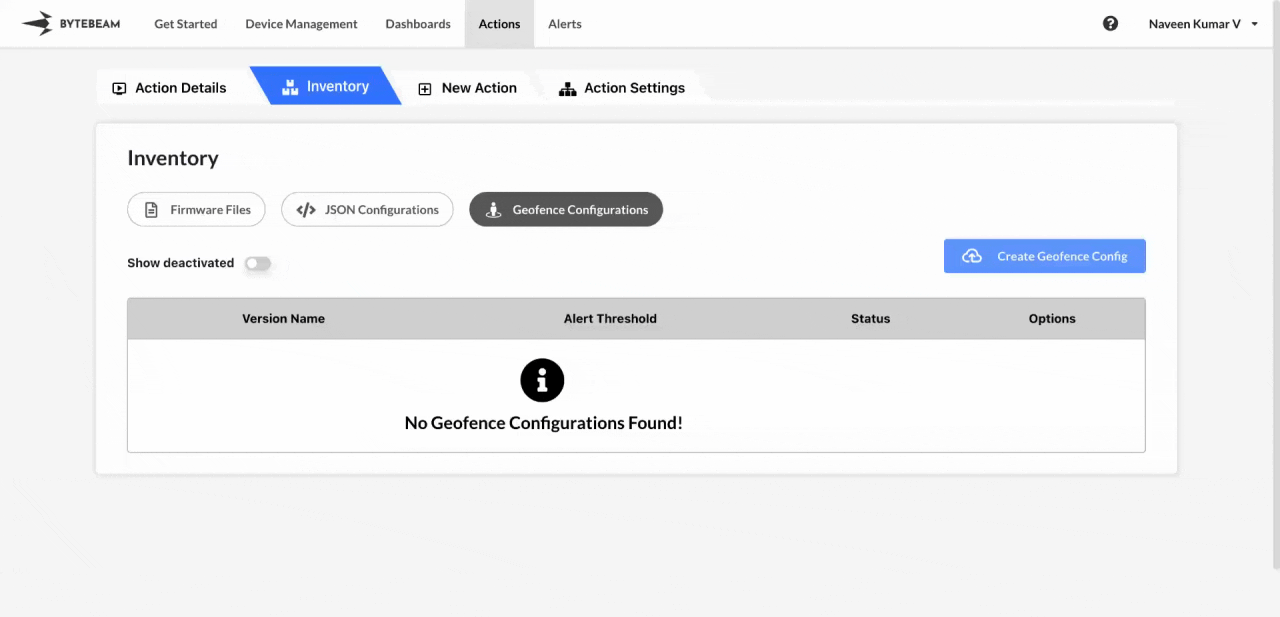
Navigate to the **Geofence Configurations** tab by clicking on the Inventory section.
Click on the **Geofence Configurations** tab and then click on the **Create Geofence Config** button.
You can fill in the details using one of the following methods:
1. **Map-Based Input**:\
Click on Map View tab, enter the configuration version name, click on the map to mark points, ensure the polygon is completed by clicking inside the enclosed shape, enter the value for the Alert Threshold field (in seconds), and click **Create**.
2. **JSON Input**:\
Click on JSON View tab, enter the configuration version name, input the JSON payload directly, enable the checkbox to ensure the polygon is completed, enter the value for the Alert Threshold field (in seconds), and click **Create**.
The JSON input method allows for precise geofence creation by specifying location details such as latitude and longitude.
## Important Info
You can remove the last selected point by clicking on **Undo Last Point** on the map.
This new geofence configuration can be applied to a device using the **update\_geofence** action type.